
How to Organize a Narrow, Deep Pantry Cabinet
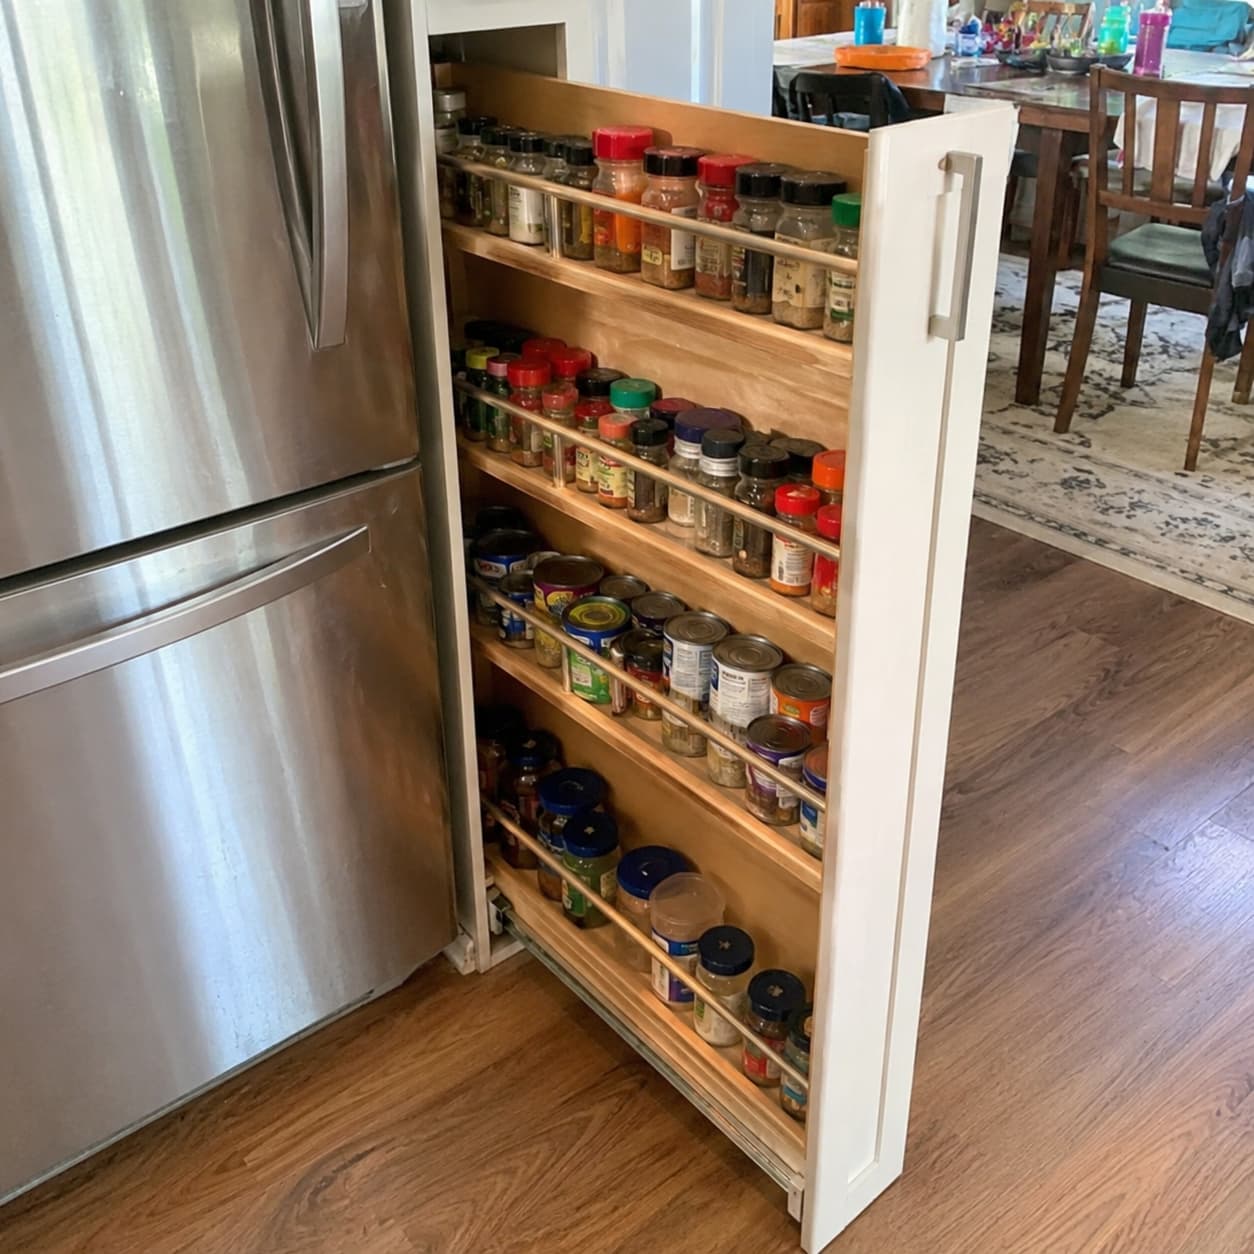
A six inch gap between the fridge and the wall looks like dead space until a manufacturer turns it into a cabinet, and then it looks like storage until you actually try to use it. The width is the whole problem here, not the depth. A standard base cabinet runs about 24 inches deep, and a wide one gives you room to reach past the front row with a full hand. A cabinet only 6 to 9 inches wide doesn’t. Your hand goes in at an angle, your knuckles hit both side walls at once, and anything past the first six inches becomes a spot you locate by feel rather than sight. Depth alone is annoying. Depth combined with a hand that can’t turn sideways inside the opening is what actually makes these cabinets useless within a month of moving in.
The fix isn’t a bin. A bin sized to fit a 9 inch opening still has to be pulled out by reaching into that same narrow gap, which solves nothing. What works is a slide out unit built specifically for narrow openings, which turns the whole depth of the cabinet into something that comes to you instead of the other way around.
Quick Overview
Time required: 90 minutes to 2 hours for measuring, installing a pull out unit, and loading it
Difficulty: Easy to moderate, mostly driven by whether the unit needs mounting hardware
Cost range: $40 for a tension mounted wire shelf setup, up to $350 for a fully assembled slide out pantry unit
What you’ll need: Tape measure, a slide out pantry unit sized to your opening, a drill if the unit mounts to the cabinet walls
Who this is for: Anyone with a narrow gap cabinet next to a fridge, oven, or wall, typically 6 to 15 inches wide
Why a Narrow Opening Punishes Depth Twice
A wide, deep cabinet is annoying because the back is hard to see. A narrow, deep cabinet is worse, because the back is hard to see and hard to reach at the same time. Most face frame cabinets, which cover the majority of American kitchens, lose about an inch of usable width to the door frame itself, so a cabinet built and sold as 9 inches wide often has an opening closer to 7.5 to 8 inches once you measure the actual gap a hand fits through. Inside that gap, a human hand needs roughly 4 inches of clearance to grip and pull something out without scraping both knuckles, which leaves almost no margin once you’re also trying to see past the first few inches of depth.
That’s why loose bins fail here in a way they don’t in a wider cabinet. A bin narrow enough to fit a 7.5 inch opening still needs to be gripped and dragged forward through that same tight gap, and anything behind it in the same cabinet has to wait its turn. A slide out unit changes the mechanism entirely. Instead of a hand reaching in to find and pull an item, the whole shelf system extends outward on rails, and everything on it arrives at the front of the cabinet without a single item needing to be located by feel first.
Matching the Pull Out to the Actual Opening
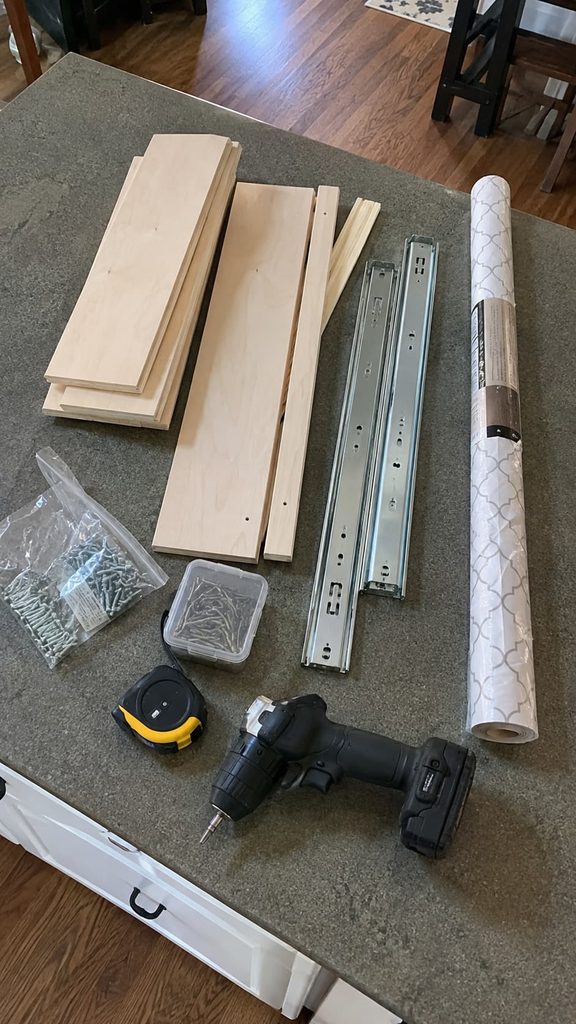
- Slide out pantry unit, $180 to $350 fully assembled. Sold in standard width tiers of 6, 9, 12, and 15 inches to match common narrow cabinet openings. Order sized to your measured opening width minus 1 inch, which leaves clearance for the slide hardware on each side without binding against the door frame.
- Full extension ball bearing slides, usually included with the unit, rated around 100 pounds per shelf. A fully loaded shelf of canned goods typically weighs 15 to 25 pounds, well under that rating, so the limit in practice is almost always shelf space, not weight.
- A tension mounted wire shelf column, $40 to $70, for a cheaper or rental friendly alternative. These sit inside the opening under spring pressure rather than screwing into the cabinet walls, which trades some stability for zero permanent installation.
- Shelf liner, about $8 a roll. Keeps glass jars from sliding sideways during the pull and push motion, which matters more here than in a fixed shelf, since anything not secured shifts every time the unit moves.
- A drill and the mounting screws included with a slide out unit, if going with the assembled option rather than the tension mounted one.
Skip ordering the widest unit that technically fits. A 9 inch cabinet with an 8 inch opening needs an 8 inch or narrower unit with clearance built in, not a unit measured to the exterior cabinet width, which is a common and expensive mistake to return and reorder around.
Installing and Loading the Pull Out, Start to Finish
Measure before anything else — 15 minutes. Record three numbers: the opening width at its narrowest point, usually right at the door hinges; the interior depth from the front of the frame to the back panel, typically 20 to 22 inches once you subtract the door and back panel thickness from a 24 inch cabinet box; and the interior height from the cabinet floor to the underside of any fixed shelf or the top of the box. Write these down before looking at a single product, since a unit ordered from memory is the most common reason for a return.
Empty and sort what’s currently inside — 20 to 25 minutes. Everything comes out, sorted into keep, expired, and duplicate piles. Check any canned goods for dents along a seam or a lid that domes upward, both signs to discard regardless of the printed date, and check boxed or bagged dry goods for torn seals or signs of moisture. A narrow cabinet accumulates more forgotten duplicates than a wide one specifically because nothing in the back has been visible in months.
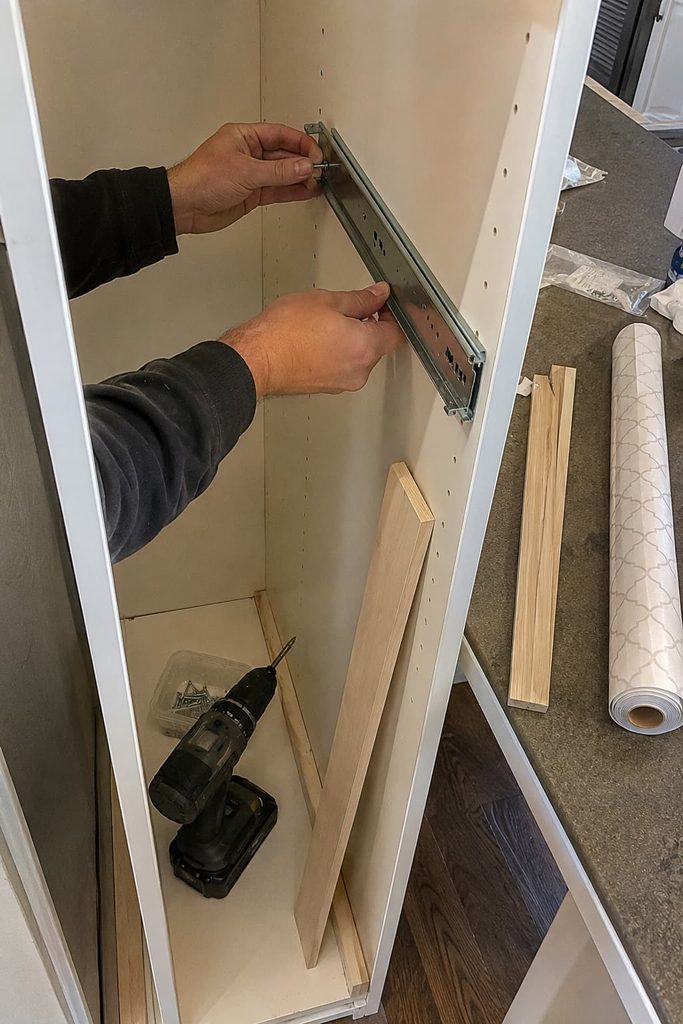
Install the slide out unit — 45 to 60 minutes. Following the unit’s included hardware, attach the mounting brackets to the interior side walls of the cabinet, typically two brackets per side spaced near the top and bottom of the opening. Test the slide action fully extended and fully closed before loading anything onto it, checking that it clears the door frame through the entire range of motion. A unit that catches at one specific point while empty will keep catching there once loaded, so this is worth confirming now rather than after the shelves are full.
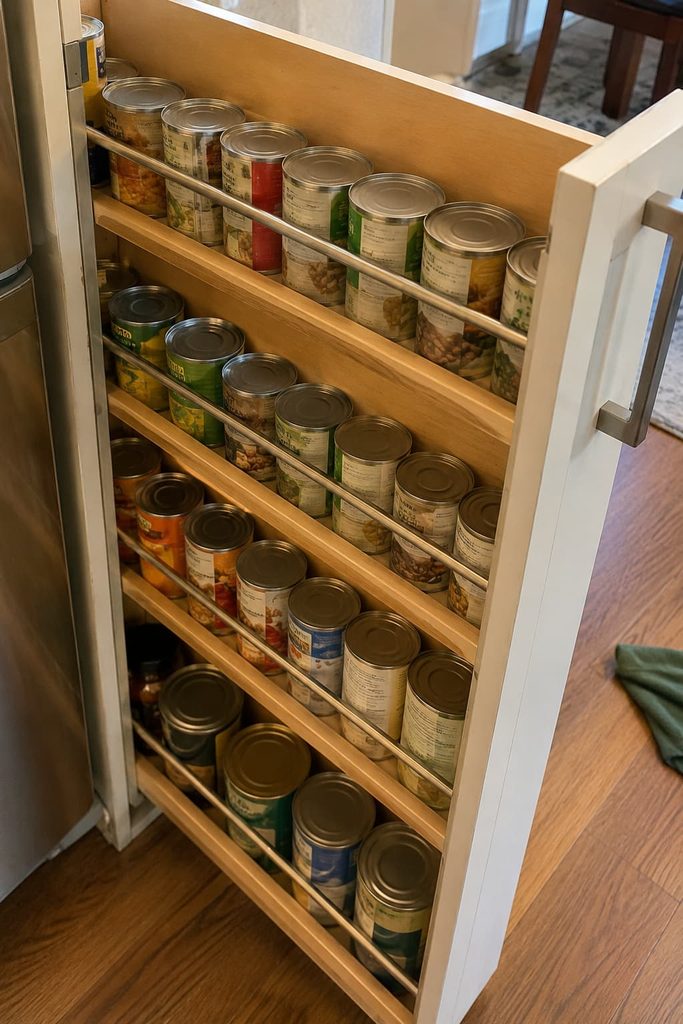
Load by weight and shape — 15 to 20 minutes. Heavier items, like large cans or bottles, go on the lower shelves, where a lower center of gravity keeps the whole unit from feeling top heavy when extended. Taller boxed items go on whichever shelf has the most vertical clearance, checked against the height measurement taken in Step 1. Leave a small gap between items rather than packing the shelf edge to edge, since a fully packed narrow shelf is exactly as hard to search through by feel as the loose cabinet was before.
What Jams or Tips Over After a Few Months
The slide sticks or drags partway through its extension. Usually crumbs or spilled residue have built up in the slide track, which is easy to miss in a gap this narrow. Fix: wipe down the exposed slide rails every couple of months with a dry cloth, done at the same time as a general kitchen wipe down.
Tall bottles tip over when the shelf extends. The motion of pulling a shelf forward has more lateral sway than a fixed shelf, and anything tall and narrow is more affected by it. Fix: move bottles and jars to a lower shelf, where the sway has less leverage, or add a shelf lip if the unit didn’t come with one.
The unit feels loose or wobbles side to side. Mounting screws driven into a cabinet wall can work loose over time under repeated pulling and pushing. Fix: check and re-tighten the mounting screws every few months, and switch to slightly longer screws if the originals keep backing out.
New groceries won’t fit because the shelves were loaded edge to edge. A fully packed narrow shelf has no room to add anything without a full reorganization. Fix: keep roughly the front inch of every shelf clear on purpose, so new items have a landing spot without displacing what’s already there.
Items still get lost near the back of a shelf. Even fully extended, a 20 inch deep shelf has room for something to slide toward the rear. Fix: use small dividers or turned up edge trays sized to about two thirds of the shelf depth, which physically stops items from migrating past where a hand can comfortably reach.
Fitting This to a Different Cabinet or Budget
A cabinet narrower than 6 inches. Some gaps are too narrow for even the smallest commercial slide out unit. A single column of adhesive backed wire racks mounted to the inside of the door itself often makes better use of a gap this tight than any freestanding shelf system.
Renting. Skip anything requiring screws into the cabinet walls. A tension mounted wire column applies pressure against the top and bottom of the opening rather than the sides, and lifts out cleanly at move out with no holes left behind.
A cabinet taller than a standard base unit, like a floor to ceiling pantry column. Order a taller slide out unit rated for the full height, and space the shelves further apart near the bottom for larger items and closer together near the top for smaller ones, rather than spacing every shelf identically.
A tight budget. A tension mounted wire column plus a $6 roll of non slip liner covers the same function as an assembled unit for a fraction of the cost, with the tradeoff being a lighter duty weight rating, typically closer to 25 to 35 pounds per shelf instead of 100.
A household that shops in bulk. A narrow cabinet isn’t the right spot for backstock regardless of what unit goes inside it. Keep this space for what gets used weekly, and store bulk duplicates somewhere with more volume, like a garage shelf or a wider pantry elsewhere in the kitchen.
Narrow Pantry Cabinet Questions
How narrow can a cabinet be and still hold a slide out unit?
Most manufactured slide out pantry units start at 6 inches wide. Anything narrower than that generally needs a door mounted rack instead of a freestanding shelf system.
Do I need to hire someone to install a slide out unit?
Not usually. Most assembled units come with pre-drilled mounting brackets and take about 45 minutes to an hour with a basic drill, similar in difficulty to installing a cabinet door hinge.
What’s the actual usable depth once a slide out unit is installed?
Close to the cabinet’s full interior depth, typically 20 to 22 inches, since the shelf extends out on rails rather than sitting fixed with dead space at the back like a stationary shelf would.
Is a tension mounted unit sturdy enough for canned goods?
Yes for light to moderate loads, generally up to 25 to 35 pounds per shelf. For consistently heavy loads like a full shelf of canned goods, a mounted slide out unit with its higher weight rating holds up better over time.
How do I know if my cabinet is a true narrow gap cabinet or just a small standard one?
A true gap cabinet is usually under 15 inches wide and was built to fill unused space next to an appliance, rather than being a scaled down version of a normal base cabinet. Measuring under 15 inches at the opening is the practical cutoff for needing narrow specific storage solutions rather than standard bins.
Can this same approach work in an upper cabinet instead of a base cabinet?
Yes, with a shorter unit sized to the upper cabinet’s typical 30 to 42 inch height rather than a full height column, following the same measure first, order to the opening width minus 1 inch approach.
Six Inches Is Still Real Storage
A narrow gap cabinet gets ignored or half used far more often than it gets fixed, mostly because the fix looks like it should be complicated for a space this small. It isn’t. The opening width decides everything else, so measuring it accurately before ordering anything is most of the work. Once the right slide out unit is in place, a gap that used to hide half its contents by feel turns into shelving that extends fully into the room, and six inches next to the fridge stops being wasted space and starts being the spot for oils, spices, or canned goods that used to live somewhere less convenient.
